

How To Install Surface Socket
How to Install a Plastic Back Box When Fitting Sockets and Switches
In this DIY guide you will learn how to install a plastic back box on a solid or dry line wall so that electrical sockets and switches can be installed. You will also learn about the different types and sizes of plastic back box and what they should be used for and the different installation methods for running cables.
A plastic back box or patress box is a moulded plastic box normally made of either PVC or resin that is fixed to the surface of a wall so that's an electrical socket, light switch, FCU etc. front plate can be screwed to it and secured in place.

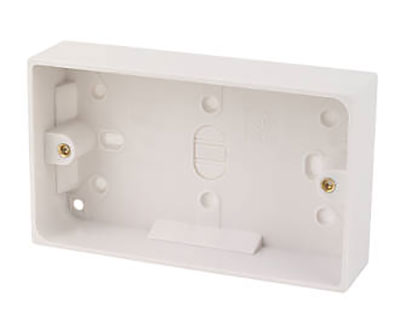
Standard single gang plastic back box
Plastic back boxes perform the same job as metal back boxes (more info on metal back boxes in our project here), but whereas metal back boxes are recessed into a walls surface, plastic back boxes are surface mounted or fixed to the face of a wall.
Fitting a plastic back box is a pretty easy job, read on below to find out how.
NOTE: Before you start any electrical work always ensure that you have isolated (turned off) the circuit you are working on at the consumer unit or fuse box. Electricity is highly dangerous and all safety precautions should be adhered to.
Different Types and Sizes of Plastic Back Box
There are several different types of plastic back box, the surface mount type that we have mentioned above, that is fixed to the face of a solid wall and also one other type.
This type, although sometimes called a plastic back box is actually called a dry lining patress box or dry lining knockout box and is for use with dry line or plasterboard walls.
Essentially it works the same way as a metal back box and is recessed into the walls surface allowing the socket or switch face plate to fit flush with the walls surface.
Although technically they are not plastic back boxes it's important that we mention them to make the distinction between them. For more information on dry lining back boxes see our project here.
Dry lining back box for use in plasterboard walls
Coming back to the plastic back boxes we are looking at in this project there are several different types and sizes.
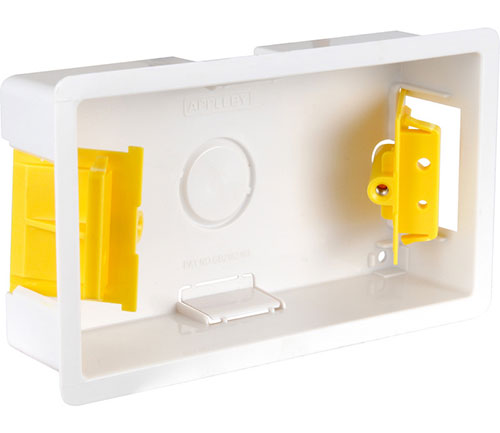
In terms of types, the two main types of plastic back box are single gang or 1 gang and double gang or 2 gang. Single gang boxes are for use with single gang sockets and switches and double gangs are for use with double gang switches and sockets.
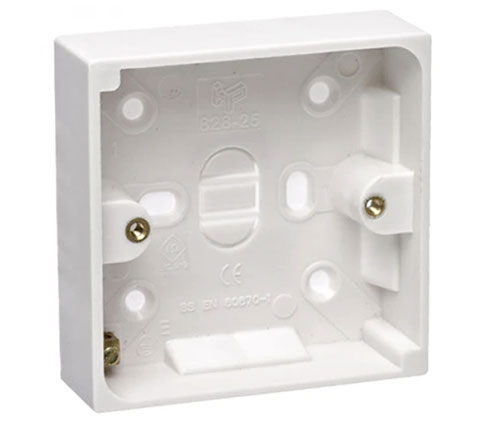
Single gang plastic back box
Double gang plastic back box
Each different type of back box is available in a range of different sizes for different applications. They mimic the sizes of metal back boxes so that all is uniform across the industry:
- 16mm – Only for use when wiring light switches due to lack of space
- 25mm – General use for both lighting and sockets
- 35mm – For use where larger 6mm or 10mm cabling is used
- 47mm – For use where larger 6mm or 10mm cabling is used
However some manufacturers do differ their sizes slightly from the standard, for example 25mm deep being 28-29mm. This doesn't make a huge amount of difference but it's good to be aware of.
When it comes to compatibility, not only are all made to a uniform size but all the screw fixing points are also made to the same size and position across all manufacturers so any back box will work with any faceplate or accessory.
The only real differences come in the fact that some back boxes and face plates have rounded corners and some have square corners.
Different Installation Methods for Plastic Back Boxes
There are several different ways that a plastic back box can be installed and used.
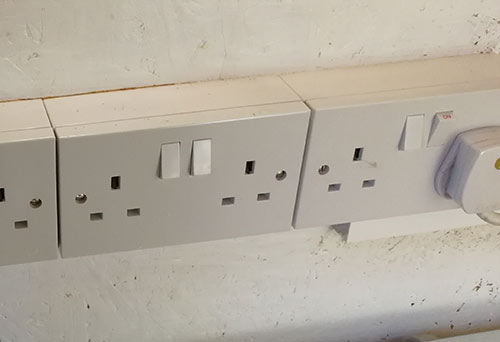
The most popular way is, as mentioned, surface mounting them and running cables between each point using plastic trunking.
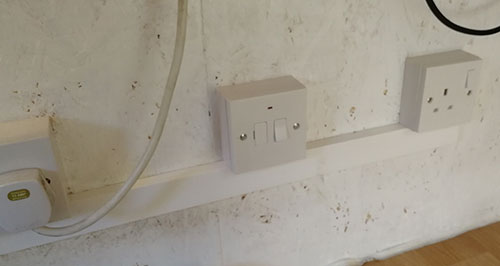
Surface mounted sockets connected using plastic trunking
In most situations cables are run through plastic trunking with the back box and socket on top the trunking. Holes are made in the bottom of the back box and the cable is run up through the trunking to connect to the socket, switch etc. This setup makes for a quick and cheap install.
Another technique is to make holes in the sides of the back boxes and then run trunking between them to hold the cabling. This looks a little tidier than using acres of trunking but can be a little fiddly.
Trunking run between back boxes
One final technique is when you already have a cable in place that's been chased in the wall. You can simply knock a hole in the back of the back box and run the cable in.
Problems With Plastic Back Boxes
Surface mounted plastic back boxes are quite often associated with a cheaper electrical install as all of the back boxes and cabling is surface mounted on the wall as opposed to being recessed and hidden inside the wall and due to this many regard it as being somewhat unsightly.
Ultimately for the very best finish it's much better to hide everything away inside the wall, it all looks so much cleaner and more professional. However in some situations or if the budget doesn't allow, surface mounting is the only option.
Another issue is that because things aren't recessed they protrude out from the wall and become an obstacle that can easily be knocked and damaged, especially when deeper 47mm back boxes are used.
Deep plastic back box sticking out form wall causing a hazard
One final issue is that plastic back boxes do tend to be quite brittle and can easily crack is screws and fixings are over tightened or as mentioned they are knocked into. Due to their brittle nature you also can't drill in to them as they tend to shatter.
How to Install a Plastic Back Box
Now that we know what a plastic back box is and what it's for it's time to look at how they are installed.
In this example we are going to be installing our back boxes on top of an existing section of trunking.
As this is in a garden shed we are fixing to an OSB wall so screwing the back box to the surface is fairly simply. When fixing to solid brick, block or stone walls you will need to drill a hole using a masonry bit and then insert wall plugs to screw the back box to.
Knock out Screw Fixings and Cable Access
The first job is to use a small screwdriver to knock out the thin plastic coverings out of the screw fixing holes on the rear of the box and also the area that the cable is going to enter.
Prop the box off of the floor or your work surface and gently tap out thin plastic coverings for the screw holes you will be using.
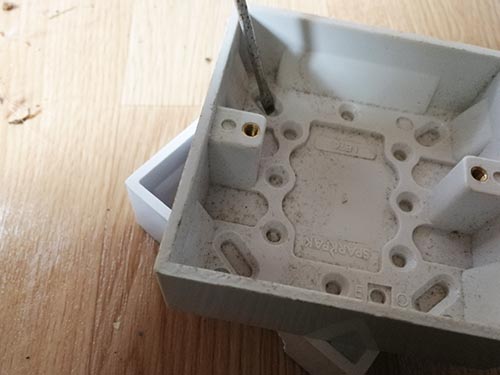
Tap out thin plastic coverings from screw fixing points
Depending on where your cables are going to run into the back box will dictate which access points you remove. In this case we are coming in form the base so the 3 blanking covers from the box were chipped out using a screwdriver.
To allow a bit more access we then used a pair of pliers to snip out the dividers to create a much more open access point.
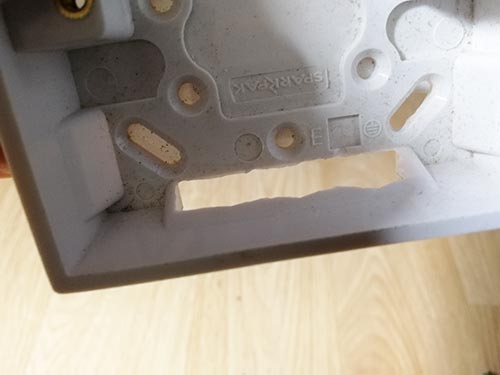
Blanking covers removed from base of plastic back box for cable access
Position Back Box on Wall
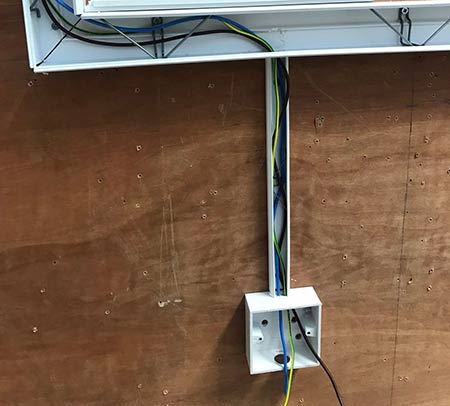
Next position the back box in place on the wall. In tis case all we need to do is align it on top of the existing trunking and the cable holes. As the trunking is also fully leveled up we don't need to level the box as it's being fixed in place.

Back box fixed to wall on top of trunking
If you are fixing your back box to a wall without any existing items to level it against you will need to use a spirit level to level it before fixing.
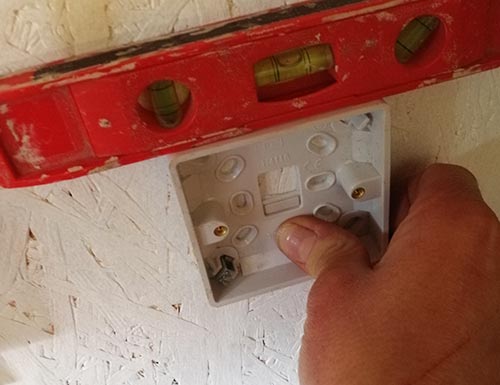
Levelling plastic back box using a spirit level
Screw Through Fixing Holes
With the back box in place on the wall and leveled if needed the next task is to now screw it in place.
As mentioned, if you are fixing to a solid wall then you will need top mark each hole, drill it out and insert a wall plug before screwing it up.
In this case as we are fixing to a timber surface we can simply screw each screw in.
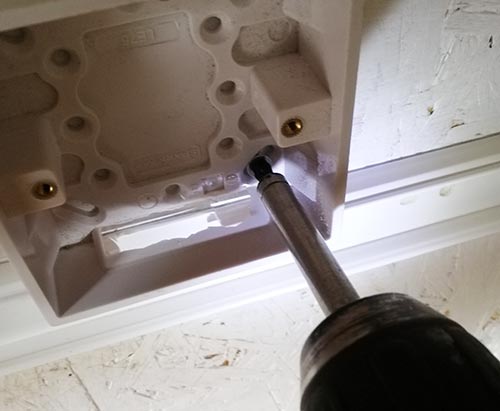
Screwing plastic back box to walls surface
Run Cables
Once the box is fully fixed in place, the only job left to do now is to run in your electrical cables and then connect up what ever fixture you're installing.
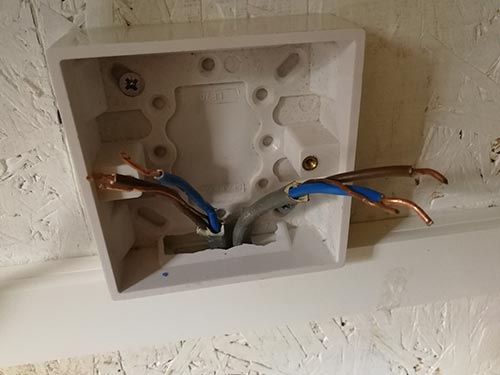
Running cables into back box ready for connecting up
Fixing and installing a plastic back box to a wall to house a new socket, switch or other object is a pretty straight forward job, however be sure that a surface mounted box is the best way to go as if you can recess a metal back box this will ultimately give a better finish.
All project content written and produced by , founder of DIY Doctor and industry expert in building technology.
How To Install Surface Socket
Source: https://www.diydoctor.org.uk/projects/plastic-back-box.htm
Posted by: vickreytheacce46.blogspot.com
0 Response to "How To Install Surface Socket"
Post a Comment